- How to Add an Extra Field for a Particular Schema Type in Schema Pro?
- How to enable/disable schema markup from post/page?
- How to Add Ratings using Shortcode in Schema Pro?
- How to disable a specific schema markup from post/page?
- How to Add Schema Markup on Subcategories
- How to Disable the White Label Settings Permanently?
- How to Disable Corporate Contact Schema?
- How to Remove Home List Item from Breadcrumblist Schema?
- How to Remove Shop Item Link from BreadcrumbList Schema on Product Page?
- How to Test a Schema Snippet?
- Mapping Your Schema Fields in Schema Pro
- How to Add an Extra Field for a Particular Schema Type in Schema Pro?
- How to Use the Schema Pro plugin?
- What is the All-in-one Schema Pro plugin?
- How to map required fields with Custom Fields?
- How to create a Custom Fields using Schema Pro?
- How to target specific areas of the website?
- How to enable/disable schema markup from post/page?
- How to Add Ratings using Shortcode in Schema Pro?
- How to Add a Schema markup for an Article on your website?
- What is the Difference between the Free and Pro Plugin?
- How to map fields with custom fields from third party plugins?
- How to Accept User Ratings from Users in Schema Pro?
- How to Update Schema Pro?
- How to Register Your Copy of Schema Pro? (License Registration)
- Selecting Organization Type in the Setup Wizard
- Schema Pro Setup Wizard
- Getting Started with Schema Pro
- How To Install Schema Pro Plugin
- How to Add a Schema markup for an Event page?
- How to Add a Schema markup for a Review page?
- How to Add a Schema markup for a Local Business Page?
- How to Add a Schema markup for a Service Page?
- How to Add a Schema markup for a Product page?
- How to Add a Schema markup for a Course page?
- How to Add a Schema markup for a Recipe page?
- How to Add a Schema markup for a Person or About Page?
- How to Add a Schema markup for a Job Posting page?
- How to Add a Schema markup for a Video Object?
- How to add Corporate Contact Markup?
- How to Add a Schema markup for a Book page?
- How to Add a Schema Markup for a FAQ Page?
- How to Add a Schema Markup for a How-To Page?
- How to Add a Schema Markup for an Article Page?
- The Difference: FAQ Schema Type & FAQ Schema Pro Block for Gutenberg
- FAQ Schema Pro Block for Gutenberg
- How-to Gutenberg Block in Schema Pro
How to Add a Schema markup for a Recipe page?
If you’re a food blogger, chef, or just a hobbyist when it comes to cooking, you often have recipes that your friends and family are always envious of. Having a recipe page is the best way to spread the word and make your culinary creations shine!
Adding schema to your recipe page is the best way to allow Google to display rich snippets of your recipes in their search results. Before publishing your recipe, remember that a picture is worth a thousand words. Utilizing a freemium photo editor can help make your dishes look as good online as they taste in person.
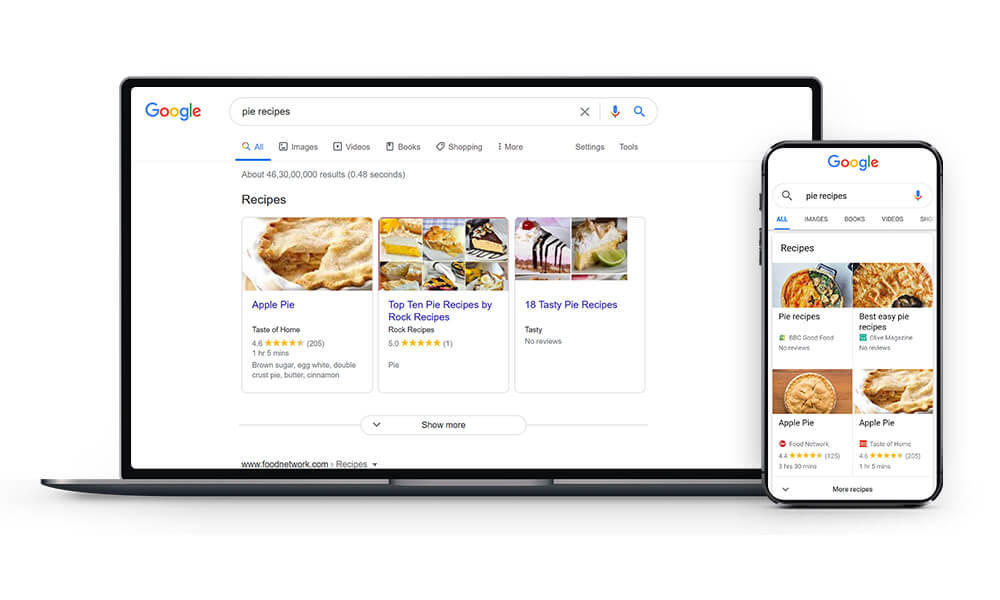
NOTE: The actual appearance of these snippets in search results may vary. To see the most updated style, check Google search results.
Enable rich snippets of your recipes, including the ingredients, time to cook and prep, and nutrition benefits to be shown on Google’s search results page by adding schema markup with Schema Pro.

The Schema Pro plugin adds a Recipe schema markup to your recipe page/post.
Let’s see how to add recipe post schema with easy steps –
How to Add the Recipe Schema Markup?
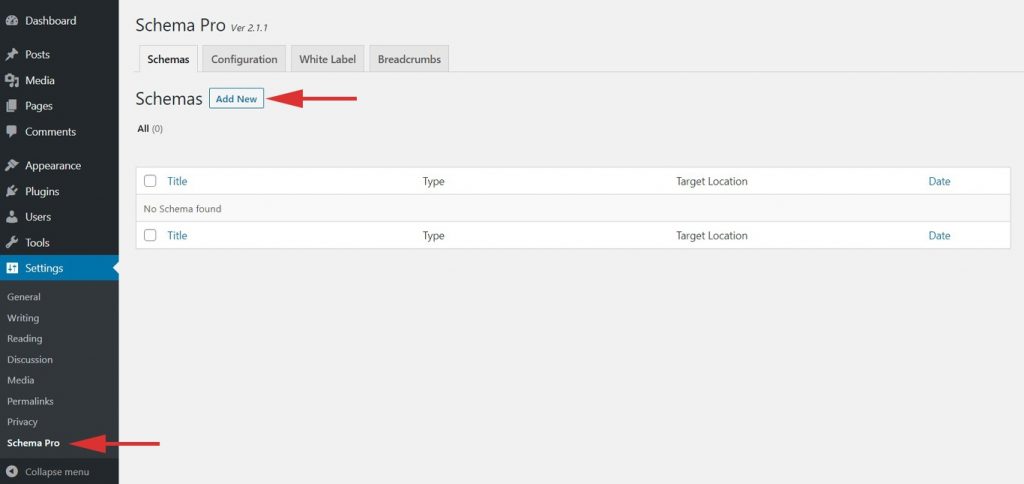
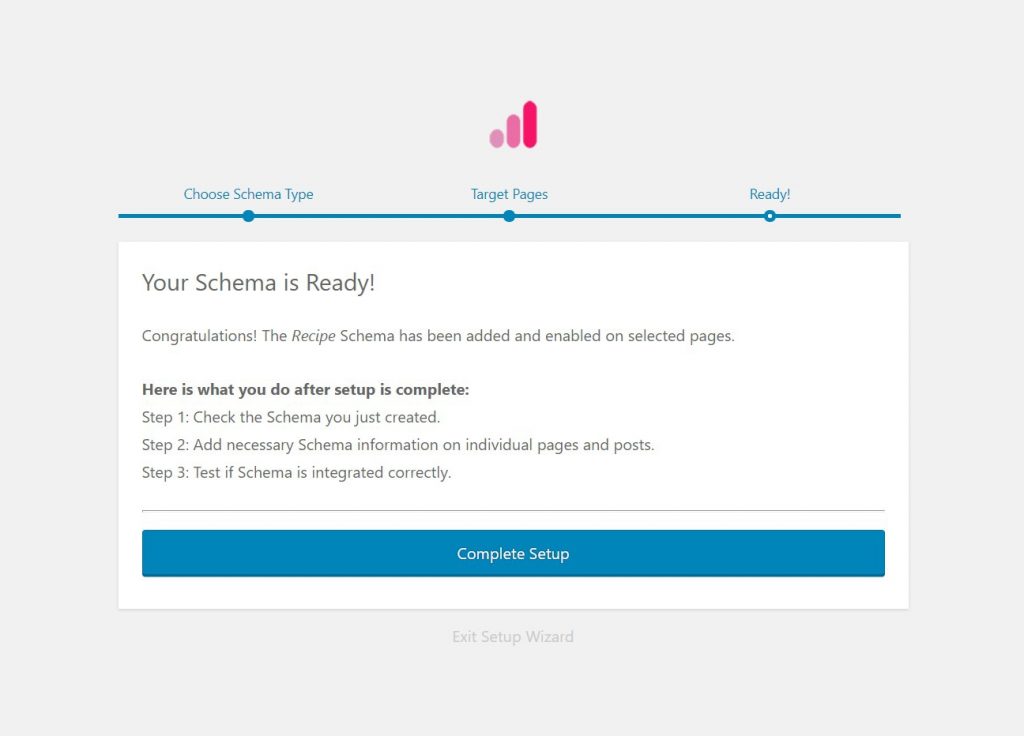
Step 1. Create a new Schema markup by going to the Schema Pro option under WordPress Dashboard > Settings > Schema Pro. Click on “Add New”.
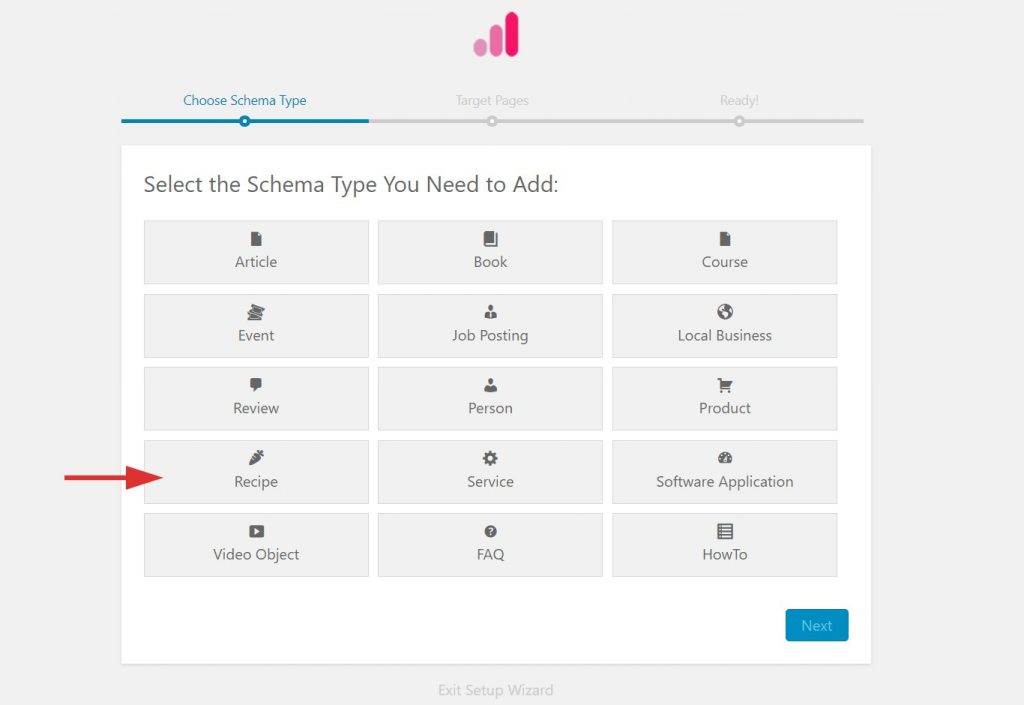
Step 2. Select the type of schema as “Recipe”.
Step 3. Select the pages/posts that you want to apply this markup to. You can add display rules and also exclude pages and posts you want to exempt this schema from.
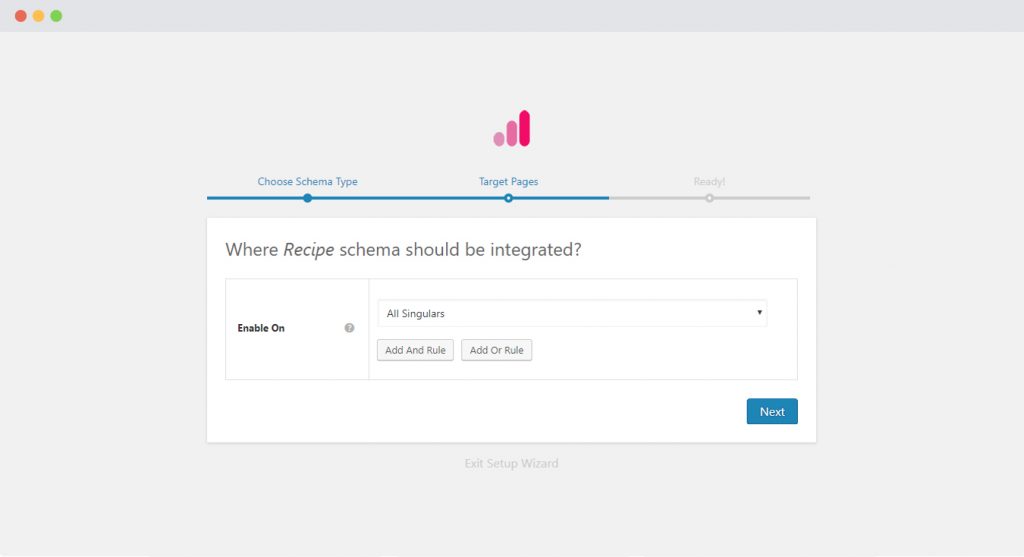
If you want to know more about how you can target specific pages and posts, check out our article on it.
Step 4. You can then complete the setup and proceed to map the required properties with fields that you already have on your website, posts, or pages. Go to the section below to learn more about what each field means.
Step 5. In Schema Settings, you will see various fields related to recipe schema. These fields help you enter details about your dish. We recommend you make sure that all schema fields are put on the right values.
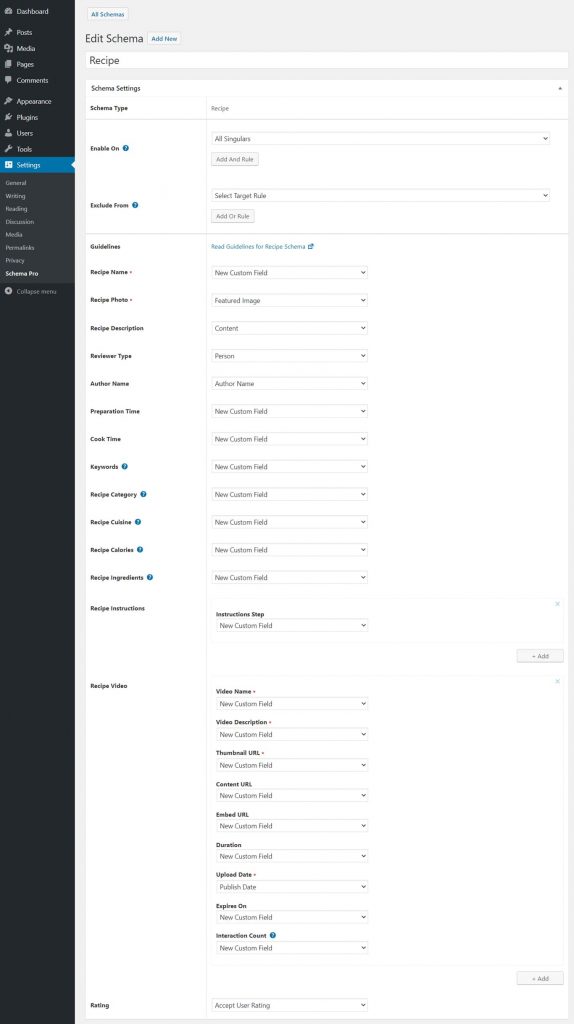
Check out the next section to understand all available fields in the Recipe schema markup.
What Do These Fields Mean?
Let’s dive into what these fields mean so that you can map the correct ones.
In the following table –
– Asterisk sign (*) indicates required fields.
These fields are required by Google and if not filled out will result in an error on the Rich Snippets Test.
– Caret sign (^) indicates the recommended fields.
These fields are recommended to ensure maximum utilization of the SEO benefits of Schema Pro and will increase your chances of displaying Rich Snippets. If not filled out will result in a warning on the Rich Snippets Test.
| Fields | What They Mean |
| Recipe Name * | Name of the dish or recipe that you have on your page. |
| Recipe Photo * | This will be the image of the finished dish or recipe. Additional Image Guidelines: Every page must contain at least one image (whether or not you include markup). Google will pick the best image to display in Search results based on the aspect ratio and resolution. Image URLs must be crawlable and indexable. Images must represent the marked-up content. Images must be in .jpg, .png, or. gif format. For best results, provide multiple high-resolution images (minimum of 50K pixels when multiplying width and height) with the following aspect ratios: 16×9, 4×3, and 1×1. |
| Recipe Description ^ | This is a short description about the dish. |
| Author Type ^ | Specify whether the author is a person or organization. |
| Author Name ^ | The name of the person or organization that wrote or invented the recipe for the dish. |
| Preparation Time ^ | The length of time it takes to prepare the dish. Additional Guidelines: Recommended Format: [hh][mm][ss]Always use this field in combination with cookTime. |
| Cook Time ^ | The length of time it takes to cook or bake the dish. Additional Guidelines: Recommended Format: [hh][mm][ss]Always use this field in combination with prepTime. |
| Keywords ^ | Mention keywords that can describe the content. Additional Guidelines: Separate multiple entries in a keywords list with commas.Don’t use a tag that should be in recipeCategory or recipeCuisine. Good Examples: – the season (“summer”) – the holiday (“Halloween”) – Other descriptors (“quick”, “easy”, “authentic”). |
| Recipe Category ^ | The type/category of meal, course, or dish your recipe is about. Good Examples: – Dinner – Main course – Dessert – Snack |
| Recipe Cuisine ^ | The region associated with your recipe. Good Examples: – French – Mediterranean – American |
| Recipe Calories ^ | The number of calories in each serving produced with this recipe. If nutrition.calories is defined the recipeYield must be defined with the number of servings. |
| Recipe Ingredients ^ | Ingredients used in the recipe or dish. Additional Guidelines: Include only the ingredients texts that is necessary for making the recipe.Don’t include unnecessary information, such as a definition of the ingredients. |
| Recipe Instructions ^ | The steps to make the dish. Additional Guidelines: Don’t include metadata that belongs elsewhere. In particular, use the author property to specify the author, recipeCuisine for cuisine, recipeCategory for category, and keywords for other keywords.Include only text on how to make the dish and don’t include other text such as “Directions”, “Watch the video”, “Step 1”. Those phrases should be specified outside of the structured data. |
| Video | Add a video for the recipe if available. This is not a required field. That means there is no compulsion of adding this field. But in case you are adding a video, it is necessary to add its name, description, URL, and upload date. Missing any of these fields will show error in Rich Snippets Test. |
| Video – Video Name * | The name of the video |
| Video – Video Description * | Describe the contents of the video or what the video is about |
| Video – Thumbnail URL * | Add a thumbnail for the video |
| Video – Content URL ^ | Add a content URL for the video |
| Video – Embed URL ^ | The embed URL for the video |
| Video – Duration ^ | The duration of the video |
| Video – Upload Date * | Enter the date on which the video was uploaded |
| Video – Expires On ^ | Enter the date until which the video will be available |
| Video – Interaction Count ^ | Enter the Interaction Count for the video |
| Ratings | These are the ratings people have given your recipe. |
Not sure how you can fill these fields? You can refer to this article that gives you a clear picture of the fields you see in the drop-down menu.
Also, with Schema Pro you can also add extra or custom fields to your markup. Check out this article to find out how.
Configure Schema on a Single Page/Post
Once you fill the above schema fields, the values will be applied to all target locations. These values are common for all target locations.
But in case you wish to alter these values for a particular page/post, you can also find all the schema fields on each of the targeted pages/posts.
If you visit a single page/post you can see all Recipe schema fields at the bottom.
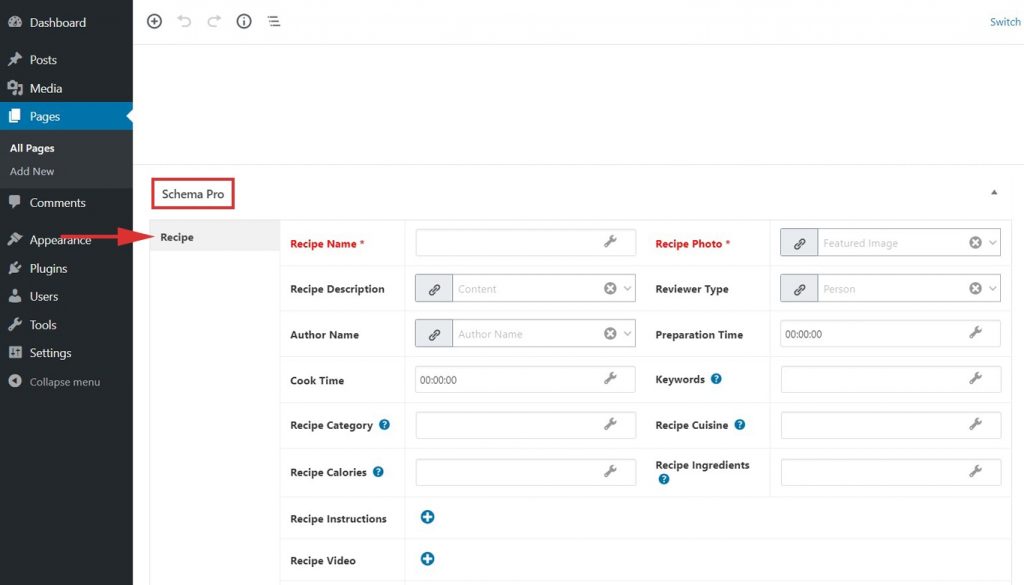
By default, all fields will fetch values from schema under Settings > Schema Pro > Recipe but you can also change this and choose other values from the list or set the values manually.
You might see some of the fields marked in red, these are required fields in the schema that do not have any value. Skipping these fields will add an invalid schema markup to the code.Read this article here to learn more about the page-level schema configuration.
Test Your Schema
Once you are done with adding schema markup, test it to see if it sets well.
Testing can be done with just a single click with the “Test Schema” button on the admin bar. Here is an article that will show you how you can test your schema.
OR
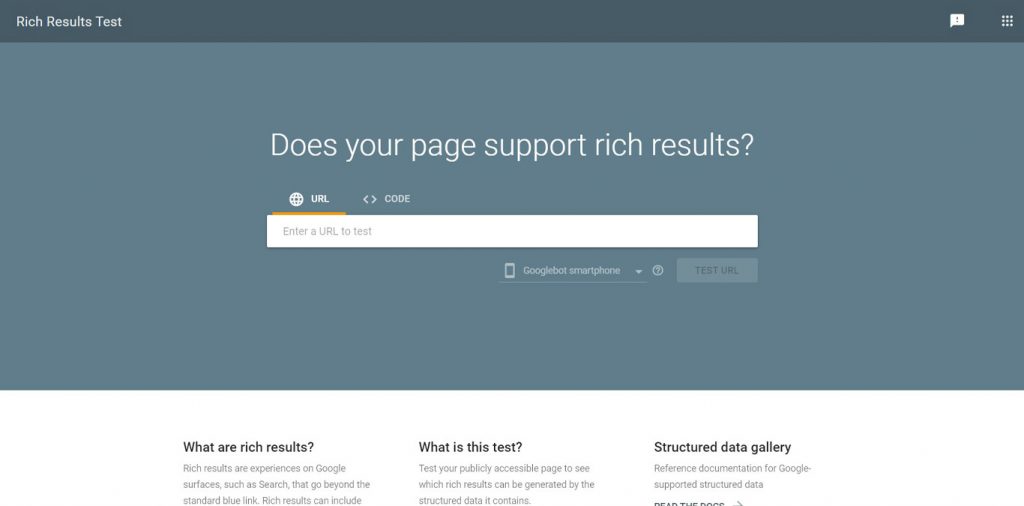
You can manually visit the Rich Results Test tool and insert your content.
Once you’re done, you’re all set to see your job posts attracting more applications through the search engine’s rich snippets!
How to Handle Errors & Warnings in a Testing Tool?
When you test your page/post with the Rich Results Test tool you might see some errors and warnings come up. Refer the article to see detailed steps to easily fix errors and warnings.
Setting up other schema types? Check them out below.
We don't respond to the article feedback, we use it to improve our support content.